
This tutorial deals with Fusion Payroll, and how it functions. In this part, we will discuss the UIs related to Proration and Retroactive Pay in Payroll.
Proration and Retroactive Pay
As discussed before in Part 1:
Proration is the mechanism used to calculate the proportionate earnings and deduction amounts whenever appropriate data that is relevant to payroll changes during a payroll period in which the payroll is calculated.
Retroactive pay processing ensures that your payroll run for the current period reflects any backdated payments and deductions from previous payroll periods.
To assist these types of payroll processing, there exist groups called event groups. Event Groups are those that define the types of data changes that trigger retroactive event notifications or prorated calculation of a person’s earnings or deductions.
Adding Event Groups
The following steps detail how to create and edit event groups in Payroll:
-
Go to the Manage Payroll Event Groups task under Define Events on the task list.
-
Click on the Search button to get a list of the predefined (seeded) event groups.
-
Click on the name of an event group to modify it. You can either add or remove events from the event group, as per your requirements.
-
To create a new event group, click on the New icon (circled in the screenshot below).
-
Enter a name for the event group. Use the radio buttons to select the type of the group (Proration or Retroactive). Select the Effective As-of Date and click on the Continue button.
-
Use the Add icon (circled in the screenshot below) to add the required Date Effective Events to the event group, as many as are needed. Use the magnifying glass icon to search and add Qualifiers to an event, and the Edit icon under Update Status to update the status of a particular event in the event group.
-
Click on the Save button followed by the Submit button.
-
The event group you just created will show up on the list of event groups on the Manage Payroll Event Groups task page.
-
Click on the Done button on the top right-hand corner.
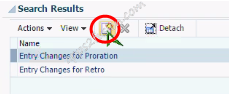
Fig. 1 - The New icon is circled

Fig. 2 - Adding events to the event group. The Add icon is circled
Enabling Proration and Retroactive Pay Processing in Elements
Once the required event groups are created, they have to be attached to the relevant element(s). The following steps detail about the elements:
-
On the Navigator menu, go to Payroll -> Payroll Calculations.
-
In the Payroll Calculations Workarea, go to the Manage Elements task under Earnings and Deductions from the task list on the left-hand side of the screen.
-
When you search for your payroll elements, you will be provided with a list. You will note that the respective “retro elements” have been created automatically for each relevant element where the retroactive processing has been enabled.
-
Click on the name of an element to view its Element Summary, where details like the Retroactive Event Group and Proration Event Group (when enabled) can be viewed.
-
Scroll down on the Element Overview table on the left and click on Retroactive Components to view the retroactive components that have been attached to the element.
-
Make sure that the retro element has Element Eligibility enabled for it as well by viewing its Element Summary.
-
In case you are creating a new element, enable proration and/or retroactive processing as follows:
-
Click on the New icon to create a new element and enter the basic information. Click on the Next button.
-
On the Additional Details page, under the section Special Rules, use the radio buttons to enable proration and retroactive processing. Choose the respective Proration Group and Retro Group (event groups) from the dropdowns. Click on the Next button.
-
Review the element information and click on the Submit button.
-

Fig. 3 - The Manage Elements task
(continued in Part 3)


