
Objective :
In this article, we will learn how to add a custom attribute in OIM.
OIM Customization :
OIM 11g R2 new user interface is probably one of the most expected new features of this release. The main reason for that is the great customization capability provided by the underlying technologies: Oracle ADF and Oracle WebCenter Composer.
OIM user interface customizations are easier now, and they 'survive' patch applications (there is no need to reapply them after patching).
1) Following steps will show how the users are searched in OIM, and what are the basic attributes displayed after a search to get an idea of basic attributes already present.
->To search for user Click On Administrator>Users
-> Click on Search button
-> Click on User Login tab to Edit the user
-> Click on Modify User tab
Now suppose I want to add an extra field here like SSN or Salary or any other attribute in the basic information of the user. Also for example in My Profile, I want to add some extra attribute to appear. This same thing we will be implementing
-> Salary is one of the attributes which is not displayed in My Profile or while trying to edit the user. To make it appear we need to add it in user form, If we add an attribute there it creates a new column in the user table and entity objects get updated automatically based on the new column added. So let’s modify a user form.
2) To modify the user form you need to go to System Admin Console and create a Sandbox. Customizations are not allowed without a sandbox so we need to create a sandbox first.
-> To create a new Sandbox click on Sandboxes
-> Click on Create Sandbox
-> Enter Sandbox name sb4custom, check Activate Sandbox option and click on Save & Close
3) Once Sandbox is created Click on Form Designer option available under Configuration.
4) Select Type as User and click on Search button in the User Form
5) Click on User Form Name that appears in Search Result
User form holds all the attributes available for that user. In this, the custom attribute is to be added.
6) ->To create a custom field/attribute click on Custom button

-> Select Field Type(Text, Number,Checkbox,Date,Lookup). Since we want to add Salary attribute we will select Number as the Field type.
-> Enter the value for Display Label as Salary. (This is the text that will appear on user form ). Display Width is 10 digits. Also, give the Name of field Salary which will be for internal use only and is never displayed to the users. Click on Save and Close.
Once you click on Save & Close button the custom attribute is added to the user form. Users table get modified with a new column and you will find attributes gets updated in entity object and as well as in VO objects.
7) No go and publish the activated sandbox.

Click on Yes
8) Again we will create and publish a sandbox (sb4cf) since it will not allow any customization without sandbox. After this, the new attribute will be available to all.
The following error will arise if Sandbox is not created :

9) Now we will add new attribute Salary. For that, we need to customize the screen, no need to go to JDeveloper.
Go to Identity Self Service Console and navigate to My Profile > My Information
->Click on Customize
→ View the source code. Click on View>Source
→ I will select Basic User Information area which I want to edit
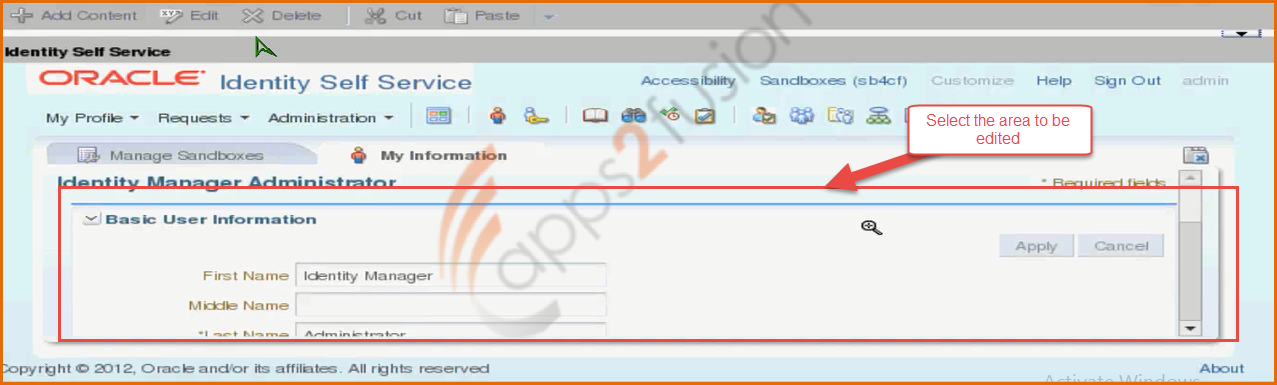
→ Click on Edit
→ In the basic information section we want to add salary component for which you need to click on Add Content :
→ Search for Data Component - My Information and open it
→ If you have added attribute newly so you need to refresh it here to make it appear. Now Open 'UserVO1'
Search for Salary attribute 'Salary_c' and click on Add (Since it’s a custom attribute 'c' it will be appended to it at last )
After clicking on Add, select ADF Input Text w/ Label option.
Salary attribute will be added as the first component, we can move it and place it after the last name. We can do this in panelFormLayout
Select panelFormLayout and Click on Edit to move the Salary after the last name.
Under child component, you can move the attributes by clicking the up and down arrows. Keep on clicking on down arrow until the Salary attribute appears after the Last Name
Click on Ok once done you can close the source window.
Now you can see that Salary attribute appears at the required position
So we have completed the task of adding custom attribute to OIM.


