
Introduction
Some of us specifically with an EBS Technical background must have used parameters during Concurrent Program Request Submission and I have been left wondering whether we can use similar feature in Oracle Fusion Cloud for creation of HCM Extract Criteria on the basis of a parameter (say Person Number) such that when we run the Extract it should only display data for the same and not for all the person records.
So for this example, we would create a very simple HCM Extract (single Data Group containing 2,3 fields only) and try to verify whether we get desired results.
So without further delay let’s get started.
Worked Example
As a first step we would have to login to Application with a user having appropriate credentials (say HCM_IMPL) for this user
Once we click on the ‘Sign In’ button this will take us to the homepage where from we need to navigate to the ‘Data Exchange’ option
Once you click on the ‘Data Exchange’ a new window will open and we need to next select ‘Manage Extract Definitions’ from the list (available on top right hand side)
We would need to create a new extract using following details:
|
Attribute Name |
Attribute Value |
|
*Name |
User Defined Parameter Extract |
|
*Start Date |
1/1/2000 |
|
*Type |
Full Profile |
When we click on OK it will list the pre-defined extract parameters
Now we need to click on the (+) Add icon and add a new parameter (using the following details)
|
Attribute Name |
Attribute Value |
|
Sequence |
70 |
|
Name |
Person Number |
|
Tag Name |
person_number |
|
Data Type |
Number |
|
Display Format |
|
|
Lookup |
|
|
Display |
Yes |
|
Default Value |
|
|
Description |
Person Number |
Next, you need to click on the ‘Switch Layout’ button and then click on the ‘Data Group’ option
We would need to create a New Data Group using following details
|
Attribute Name |
Attribute Value |
|
*Name |
Person |
|
*Tag Name |
Person |
|
*User Entity |
PER_EXT_SEC_PERSON_UE |
|
Threading Database Item |
Extract Person ID |
|
*Threading Action Type |
Object Actions |
|
Interlocking Database Item |
|
|
Root Data Group |
Checked |
|
Description |
This is a Custom Extract created to demonstrate how to use a user defined custom parameter as a HCM Extract Filter Criteria |
Next, we need to click on Save and proceed to creating Data Record. Notice that the currently grayed out ( + Create) under Records would be enabled once we save the Data Group.
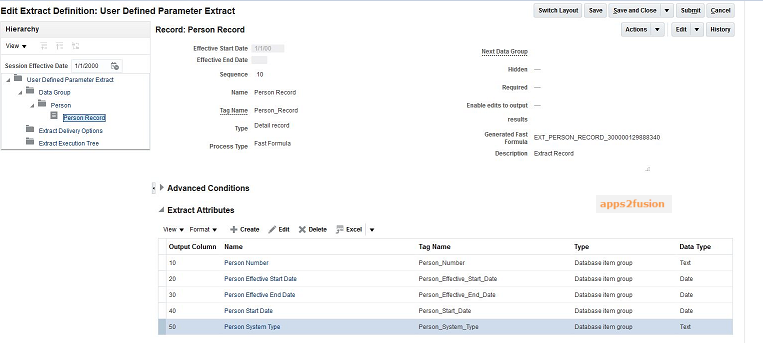
Next, we would click on OK and create a Data Record

Now we need to create Extract Attributes.
Like we have created the above attribute we would create couple more attributes.
Now we need to create a ‘Extract Delivery Options’
|
Attribute Name |
Attribute Value |
|
Start Date |
1/1/00 |
|
End Date |
12/31/4712 |
|
*Delivery Option Name |
UserDefinedParameterExtract |
|
*Output Type |
Data |
|
Report |
/Custom/Practice Samples/UserDefinedParameterExtractReport.xdo |
|
Template Name |
|
|
*Output Name |
UserDefinedParameterExtract |
|
*Delivery Type |
None |
|
Bursting Node |
|
|
Override Delivery Node |
|
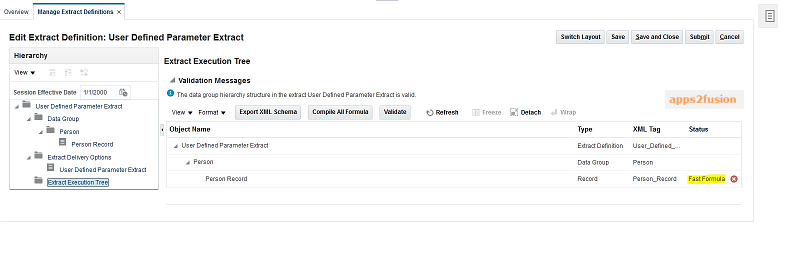
Next, we need to move to ‘Extract Execution Tree’ option
We could see that the Fast formula associated with ‘Person Record’ is in invalid state. So we need to compile the same before we proceed further. Click on Actions> Compile Formula
We should now re-visit the ‘Extract Execution Tree’ to confirm whether the Fast Formula is compiled
Once we save the Extract Creation is complete, we may verify the same (by searching the same from ‘Manage Extract Definition’ screen)
Creating Filter Criteria
Till now we have just created a custom extract but are still to add filter criteria. We would now proceed with the same. We would have to navigate to the ‘Data Group Filter Criteria’ and then ‘Add a Criteria’
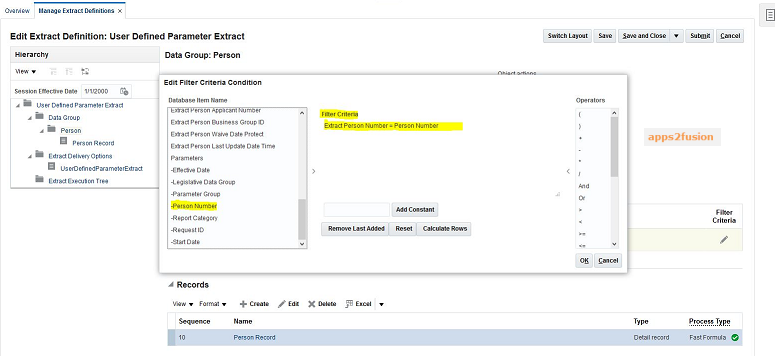
Once done we need to Click on the ‘Save’ Button.
Running HCM Extract
For this, we would need to click on the ‘Checklists’ option from the 'Navigator' icon
This would open up the ‘Payroll Checklist’ page where from we need to choose the ‘Submit a Payroll Flow’
We would need to give the parameters and run the same
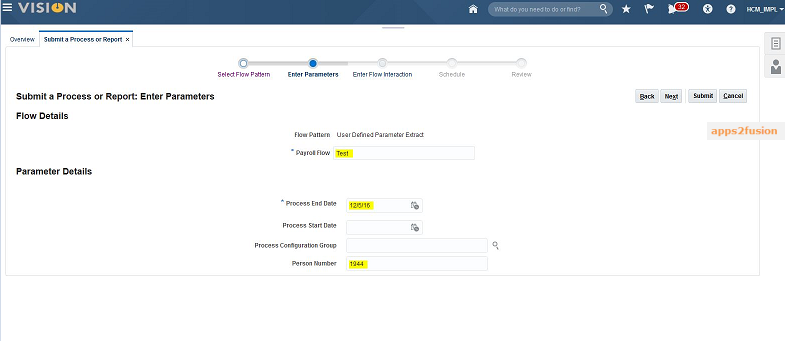
We should use the ‘Next’ button on each train stop (using default values on each page for simplicity) and submit the process. A confirmation message will be displayed.
When we click on ‘OK and View Checklist’ we would see the results.
If we click on the (→) Icon under ‘Go To Task’ we would be taken to a new screen
Hovering the mouse over the spectacles icon under View Results would open up a new pop-up screen (called View Results)
And once we click on the File Name link we would be able to open the XML file (you would be asked to choose the application on which you would like to open the file. For this example, we have used Internet Explorer)
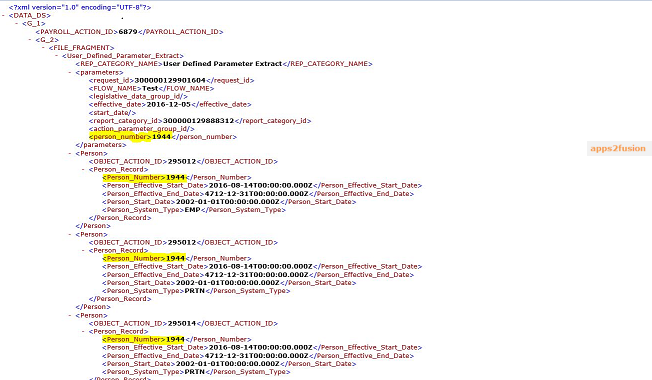
The output data only comprises of data records pertaining to Person Number 1944 ( as we have mentioned during Parameter Specification). We may even pass a different value and the Extract would return data for that particular person number too. With this we have come to an end of this article and I hope all of you had a good time going through the same.
That’s it from my side, have a Great Day Ahead!


