
This tutorial deals with Fusion Payroll, and how it functions.
Having dealt with First part, this second part deals with the UIs and walkthroughs of the following topics.
The topics covered in this tutorial are
-
Payroll Product Usage
-
Payroll Legislations
-
Payroll Lookups and Value Sets
-
Payroll Flexfields
-
Payroll Profile Options
Payroll Product Usage
To configure Payroll Product Usage, follow the below steps:
-
Go to the Manage Payroll Product Usage task.
-
The screen will show a list of countries with their legislation codes, along with the Payroll Products available for each. Use the dropdown menu to the right to select Payroll Products for that particular country. Click on the Save button. Note that only available products can be selected.
-
An error message will pop up if the selected product is not available for that particular country.
-
Click on the Done button after selecting the required (valid) Payroll Products.
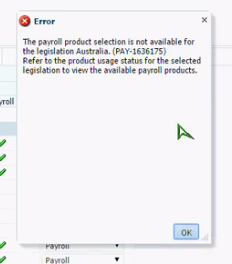
Fig. 1 - Error message for an unavailable product selected
Payroll Legislations
To configure Payroll Legislations, follow the below steps:
-
Go to the Configure Payroll Legislations task.
-
A list of legislations is shown on the Configure Payroll Legislations screen. Seeded legislations cannot be edited, and are denoted by lock symbols.
-
Click on the Create Legislation icon (circled in the screenshot below).
-
Select a country from the dropdown list that follows. Click on the Continue button.
-
Specify the details of the legislative rules and click on the Next button.
-
Select the required Element Classifications and click on the Next button.
-
Select the Payment Types and click on the Next button.
-
Select the Component Groups, which are mainly used for deduction when there aren’t any complex calculations involved. Click on the Next button.
-
Choose the required Balance Dimensions and click on the Next button.
-
After reviewing the details, click on the Submit button.

Fig. 2 - The Configure Payroll Legislations screen. Seeded legislations are denoted by the lock icon

Fig. 3 - Confirmation message. Note that the legislation has to be set in the Manage Payroll Product Usage task
Payroll Lookups
To configure Payroll Lookups, follow the below steps:
-
Go to the Manage Payroll Lookups task under Define Payroll.
-
The screen that follows will display all the payroll lookups associated currently.
-
For each lookup, the following fields are present: Lookup Type, Meaning, Description, Module, and User. You can edit the meaning and description fields for adding any explanation to the lookups.
-
Click on the Save and Close button.
Payroll Value Sets
To configure Payroll Value Sets, the following steps are to be followed:
-
Go to the Manage Payroll Value Sets task under Define Payroll.
-
The screen that follows will display all of the value sets that are currently in place.
-
After adding any particular value sets (if required), click on the Save and Close button.
Payroll Flexfields
To configure Descriptive Flexfields in Payroll, follow the below steps:
-
Go to the Manage Descriptive Flexfields for Payroll task under Define Payroll.
-
The screen that follows will display a list of the descriptive flexfields that are available for Payroll. Click on a particular flexfield’s name to modify it.
-
On the flexfield’s screen, click on the Edit icon (circled in the screenshot below) to edit the flexfield details.
-
Aftering editing the details, click on the Save and Close button.

Fig. 4 - Managing a particular flexfield (Edit icon is circled)
Payroll Profile Options
To configure Profile Options in Payroll, follow the below steps:
-
Go to the Manage Payroll Employment Hierarchy Profile Option Values under Define Payroll.
-
From the list of profile options displayed on the next screen, click on the profile option that has to be managed.
-
To add a new profile value, click on the Add icon (circled in the screenshot below).
-
Choose the desired options from the dropdown boxes available for the Profile Level and Profile Value fields. Select the User Name field by searching and selecting the relevant user. After selecting the options, click on the Save and Close button.
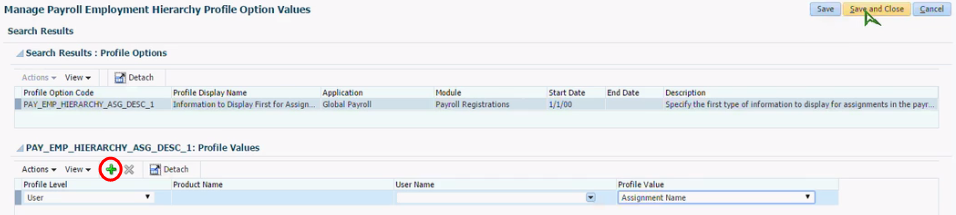
Fig. 5 - Adding a new profile value (Add icon is circled)


