


Objective
In this lab you will develop, activate, and test the integration between Oracle Sales Cloud and Marketing Cloud (Eloqua).
This tutorial targets Eloqua (Oracle Marketing Cloud). Oracle Eloqua enables marketers to plan and execute campaigns while delivering a personalized customer experience for their prospects .
Create Integration Flow
1. On the Home page click on Create New Integration under Integrations icon.

2. On Create Integration Select Basic Map My Data pattern.

3. Provide the Integration information with proper naming conventions as per your requirement as shown in the screenshot below:

4. Click on Create.
Configure Source Application
1. Drag the Oracle Sales Cloud connection we previously created from the Connections
palette to the Drag and Drop a Trigger area as shown in the screenshot below:

2. Provide the information as per your requirement with proper naming conventions on the Basic Info page, then click on Next Step as shown in the screenshot below:

3. Select Account as Business Object from the list on the Request page, and click on Next Step.

4. Select Response Type None, and click on Next.

5. Review your selections on the Summary page, and click on Done.

6. Your Integration page should display a connection to OSC as follows:

Configure Target Application
1. Drag Oracle Eloqua connection you created in previous tutorial from the Connections palette to the Drag and Drop an Invoke area.

2. Enter the information on the Basic Info page, and click on Next as shown in the screenshot below:
Field Enter
What do you want to call your connection? CreateEloquaAccount
Description Add Accounts from OSC

3. Select Accounts as the Business Object,
Select the Fields Company Name, Address ,City , Zip or Postal Code ,Country
Select Company Name for Uniquely Match On Field option,
Select Every Import Auto-Synch Time Interval option on the Operations page, and click on Next:

4. Review your selections on the Summary page, and click on Done.
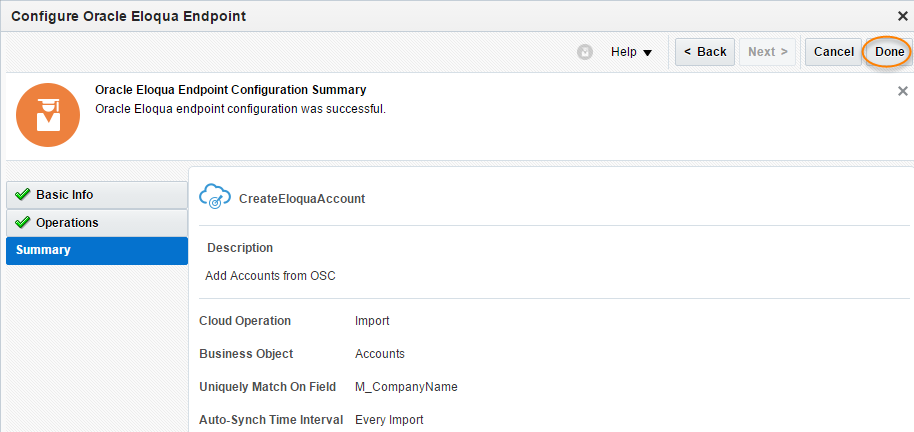
The integration looks as follows:

Map Request
We will now map the source elements to the target elements.
1. Click on the Request Mapping icon (“Click Below to Create Map area”) to invoke the mapper.

2. Map the following source fields to the corresponding target fields. Drag the source field over the
target field, aligning the text of the source field with the text of the target field.


3. Click on Save, then click on Exit Mapper.
The integration will look something like:

We will now add a tracking field to allow us to find specific instances based on business data.
1. From the integration editor click on Tracking.

2. Configure Business Identifiers for Tracking.
3. Drag and drop OrganizationName onto the Tracking Field.

4. Modify Tracking Name to the Company Name.
5. Add Help Text: Enter Company Name.

6. Click on Done
Review & Activate Integration
1. Review the Integration flow you designed. It should look like this. Note the 100% in the top right-hand
corner.

2. Click on Save, then click on Exit Integration.

3. Click on Activate and select “Enable tracing including payload into Activity Stream ”

4.Verify the status. It should now show as Active .

Test Using SOAP UI
We will test our integration using SOAP UI.
You need the endpoint URL of the OSCAccount_to_Eloqua Account_A2f_49_138 for testing.
1. From the list of integrations, locate the OSCAccount_to_Eloqua Account_A2f_49_138 which you created earlier.
Click the Integration Details icon to obtain the endpoint URL (it’s an “I” besides the action menu).
Copy the Endpoint URL displayed in the Integration Details.

2. Create a New SOAP Project.
3. Enter the Project Name and the WSDL URL details. Then click on OK.

4. Expand the process node and then double click on the Request1 node. Edit the SOAP request message; remove everything in the soap request. Copy paste the message below into the request window:
Change the OrganizationName as per your requirement.
<soapenv:Envelope xmlns:soapenv="http://schemas.xmlsoap.org/soap/envelope/"
xmlns:typ="http://xmlns.oracle.com/apps/crmCommon/content/outboundMessage/types/"
xmlns:acc="http://xmlns.oracle.com/apps/crmCommon/salesParties/accountService/"
xmlns:com="http://xmlns.oracle.com/apps/crmCommon/salesParties/commonService/"
xmlns:not="http://xmlns.oracle.com/apps/crmCommon/notes/noteService"
xmlns:not1="http://xmlns.oracle.com/apps/crmCommon/notes/flex/noteDff/"
xmlns:soapenv="http://schemas.xmlsoap.org/soap/envelope/"
xmlns:typ="http://xmlns.oracle.com/apps/crmCommon/content/outboundMessage/types/">
<soapenv:Header/>
<soapenv:Body>
<typ:process>
<!--Zero or more repetitions:-->
<typ:Account>
<!--Optional:-->
<acc:OrganizationName>Fusion Practices ( Apps2Fusion) </acc:OrganizationName>
<acc:PrimaryAddress>
<com:AddressLine1> Office 37/38</com:AddressLine1>
<com:City>Belapur</com:City>
<com:Country>India</com:Country>
<com:PostalCode>400614</com:PostalCode>
</acc:PrimaryAddress>
</typ:Account>
</typ:process>
</soapenv:Body>
</soapenv:Envelope>
5. At the bottom of the window, select Auth option to add New Authorization. Then select Basic and enter the username and password assigned to you for the Integration Cloud Service.

6. Go back to your request payload and Right click on anywhere inside the request panel and select the Add WSS Username Token option. You will be prompted with the Specify Password Type option; select PasswordText type, then select OK.


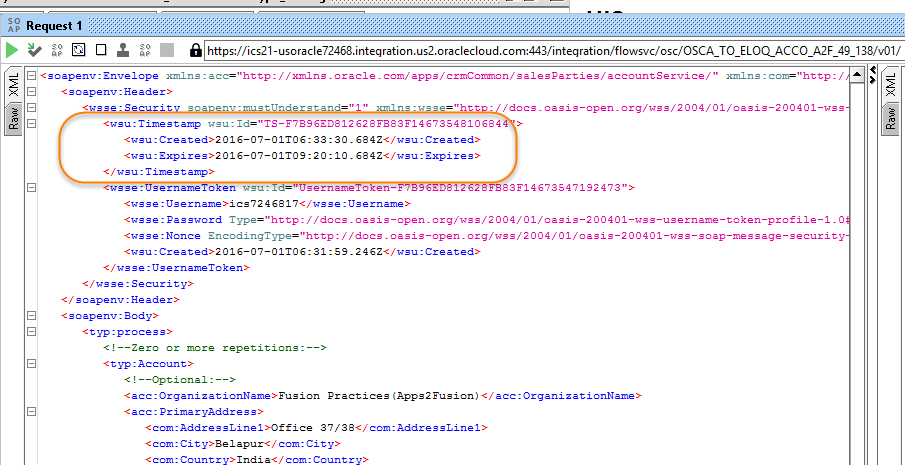
7. This should add WSS security header to the soap request. It should appear as shown below:

8. Now again right click anywhere inside the request panel; select the Add WS-Timestamp. You will be prompted to enter Specify Time-To-Live option. Provide 10000 in the text box.
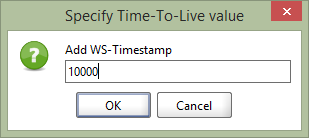
The request payload should appear now as shown below:
Now you are ready to send a request. Submit the request by clicking on the icon in the request panel.
9. Check the response state in the header for successful execution of the flow. Please note that there’s no XML content in your payload (it returns a blank page).

10. Check the Raw tab in the response tab for and check for the response: http code 200.

11. Access the Oracle Eloqua Console and verify that the account has been created.
https://login.eloqua.com/ (use Chrome browser)
12. Log in with the company name of the username and password provided to you.

13. At the top level menu, select Audience.

14. Then select Accounts.

15. In the Quick Search field, enter the account to search (the same you entered in the SOAP payload(Fusion Practices(Apps2Fusion)).

Search for Organization name and the results will show up.

Summary
In this tutorial, we created an account in Oracle Eloqua in response to an account being created in Oracle Sales Cloud.
