
Creating ODI Repository:
Objective: In the previous article we have given a brief Introduction of Oracle Data Integrator. In this article we will learn how to create ODI Repository in ODI studio.
We are going to create master and work repository for your Oracle Data Integrator.
First we are going to create schemas for our repositories, you can put your repositories in one schema but it is common to have them in separate schemas. If you run the script below you will have two schemas for your repositories with all privileges.
create user Masterodi_rep identified by Admin123;
create user Workodi_rep identified by Admin123;
grant all privileges to Admin123;
grant all privileges to Admin123;
Creating Master Repository:
So if your schemas are ready, we can continue with the master repository. In the main ODI screen, go to File > New.
Now you’ll see three options, we’ll continue with Master Repository Creation Wizard, select it and click OK to continue.
Now it is time to setup our connection to database, you will need DBA connection to setup your repository. Fill in the required fields.
Note: if you are going to use SYS user as DBA account, you have to fill DBA User area like ‘SYS as sysdba’ otherwise it will not connect. If you are using another DBA account then you don’t need to declare ‘as sysdba’. Hit the Test Connection button to see if you can connect.
There is another text box which asks for the repository ID, be sure to remember this ID, as you’ll also be asked for another ID while creating work repository. And it is important that all repositories have different IDs. As ODI does every operation with ID’s, it’s crucial not to have duplicated IDs.
Next step is the generating a password for SUPERVISOR user, this user will be our ODI admin until you will create another user with SUPERVISOR privileges. The password for this user is set as Welcome1.
Here it goes, now we will wait until ODI finishes its job. If you check your master repository schema you can see it is being populated by SNP_% tables. SNP prefix is also a heritage from Synopsis.
And here we have created our master repository. Now it is time to setup a connection and create a work repository.
Creating a Master Repository Connection:
So for connecting master repository, click Connect to a Repository in ODI Home Screen. A little window will pop-up. This is the window where you can select between your predefined connection, edit them or create new connection. As we do not have any predefined connection, we will create one from scratch. Click on +(plus) sign to add a new connection.
Now this is the connection details window. First blank will be the alias for this connection so it should be something to remind you to which repository you are connecting. First login information is for ODI user we are going to use, which is the SUPERVISOR in our case. And the second login information is for the Master Repository’s database schema, this is Admin123 in our case.Make sure Master Repository only radio button is checked before testing the connection. Because we do not have any other repositories yet. Test your connection then connect your master repository with SUPERVISOR. It’s time to move a step further.
Creating Work Repository:
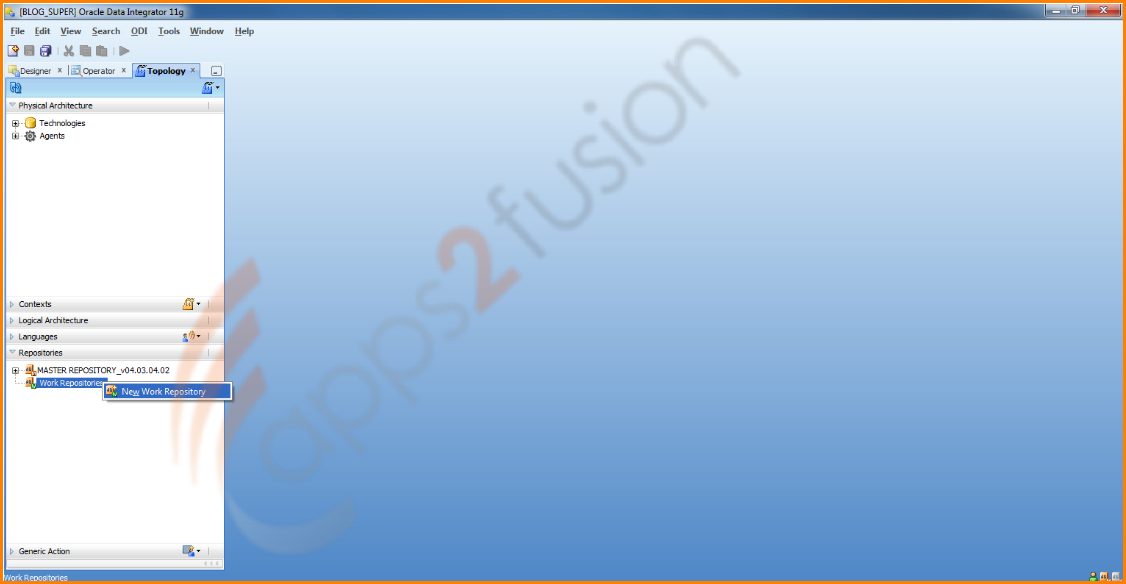
When you are connected to Master repository go into Topology view and extend the repositories accordingly. Right click on Work Repositories and click on the New Work Repository on pop-up menu.
Enter your schema information, test your connection and move on. In our case we are going to use Admin123 schema as we want our repositories to be separated.
Give a name and ID to your work repository. Don’t forget to give a different ID from your master repository’s ID. Select your work repository type in this step.
There is two types of work repositories: Development and Execution. Execution repository does not have a development ability and does not have an active Designer tab. It only holds, scenarios, load plans, sessions and topology information. Development repository has an active Designer tab, which adds this repository to hold, create, edit, delete ability of interfaces, packages, variables, scenarios, knowledge modules, model objects like tables and views.

Now let ODI to finish creating work repository.
Now ODI will ask if you want it to create a connection for new created work repository.
When you click Yes, it will ask for connection name, which we said it is connection alias. And when you click OK. It will create a connection.
Connecting to Work Repository:
ODI has created a connection for us. When you disconnect your master repository. (Under ODI > Disconnect) You can connect to work repository, click on Connect to a Repository, select your work repository connection from dropdown list. Password field will be empty, enter your SUPERVISOR password and click connect.
As we do not have any other user yet, we will connect to work repository by SUPERVISOR user.
Thanks for your patience to finish reading. Next ODI post will be about creating a user in detail, and assigning profiles to a user.


